
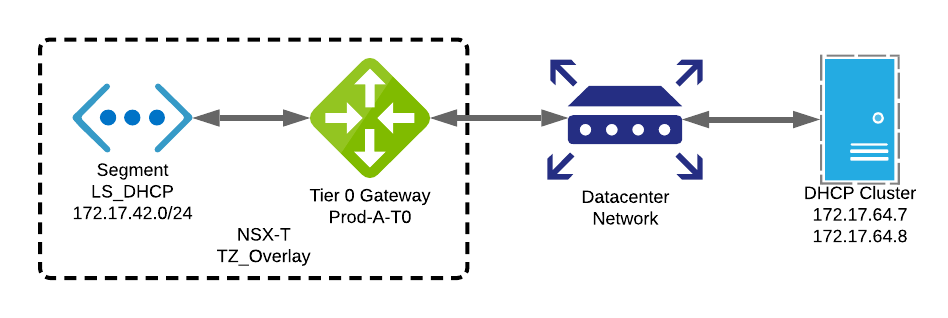
In this tutorial I’m going to show you step by step how to use the DHCP relay function in NSX-T 3.0. We’ll be setting up a DHCP enabled segment that is assigned addresses by an external DHCP server.
Setting up a DHCP relay profile
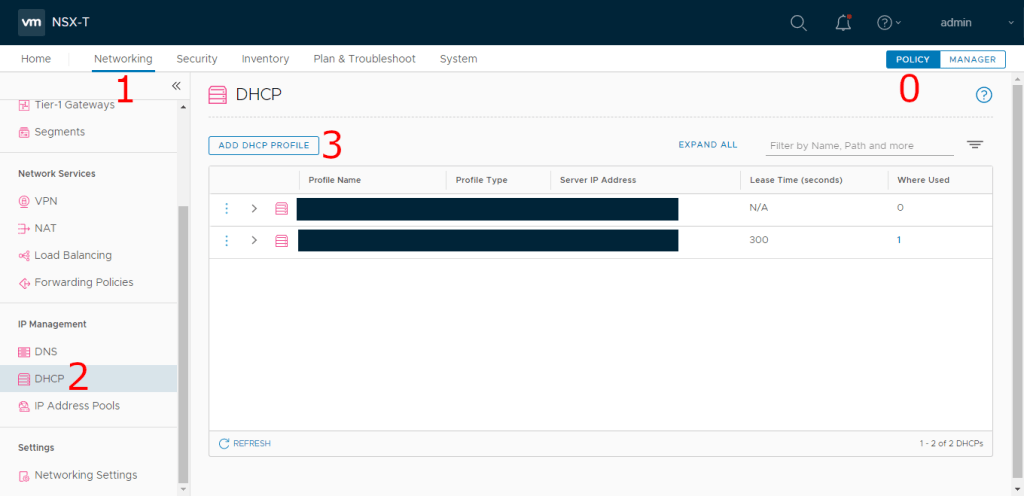
The first step is to create a DHCP server profile to be used by our segment later.
- Start in the Policy view
- Navigate to the Networking tab
- Click DHCP under IP Management
- Click ADD DHCP PROFILE
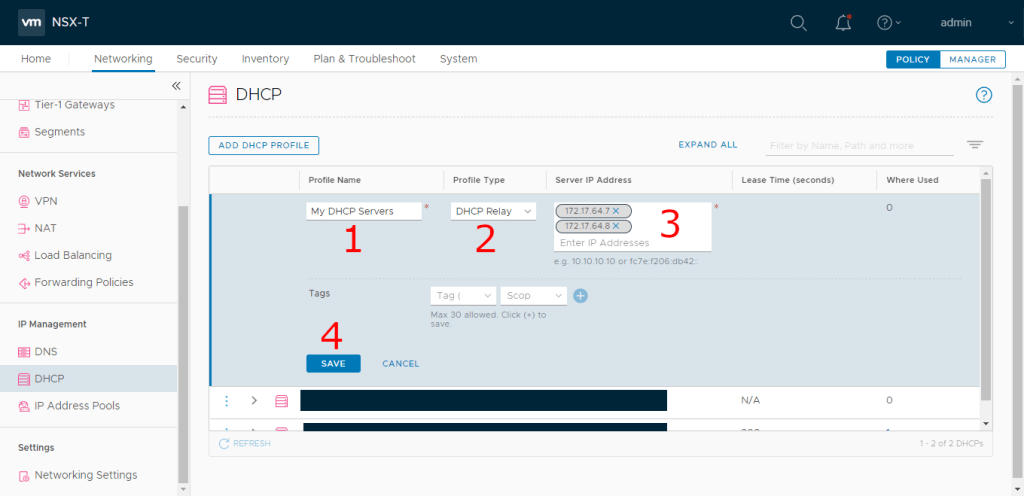
- Enter a profile name
- Choose DHCP Relay for the Profile Type
- Enter your DHCP server IP addresses
- Click Save
Create a new Segment
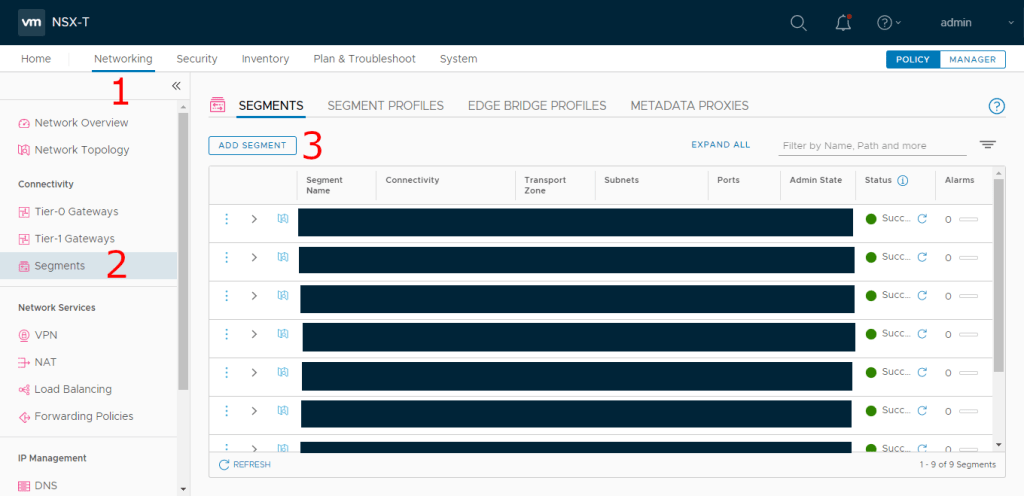
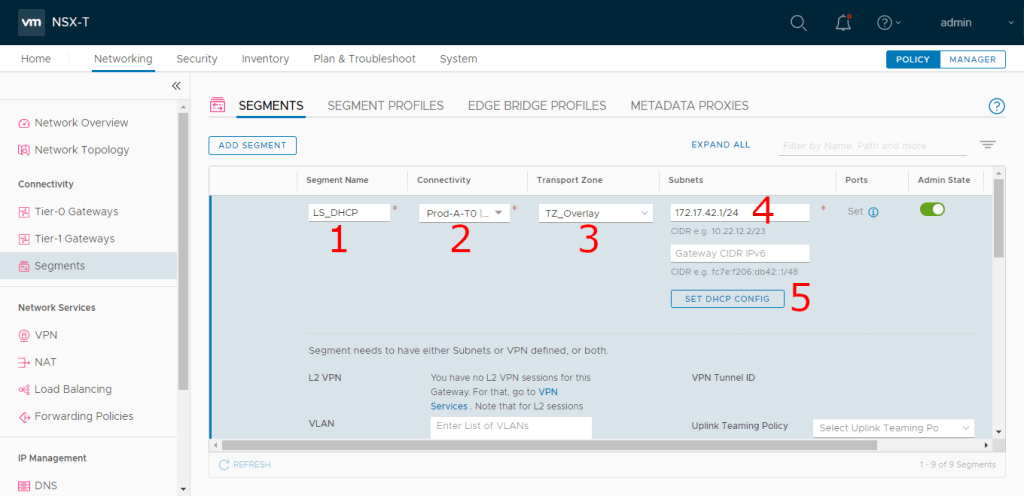
Next we’ll create our segment that uses our DHCP profile
- Start from the Networking tab
- Navigate to the Segments view
- Click ADD SEGMENT
- Enter a segment name
- Connect it to a Tier 0 or Tier 1 gateway
- Choose the appropriate Transport Zone
- Enter the IP address for this segment’s gateway in CIDR format
- Click SET DHCP CONFIG
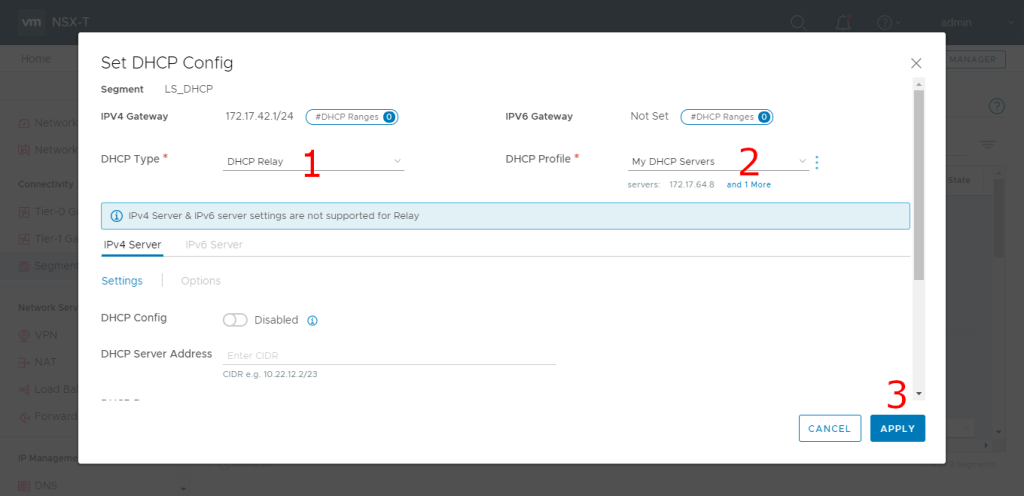
- Choose DHCP Relay for the DHCP Type
- Choose your DHCP profile we created earlier
- Click APPLY
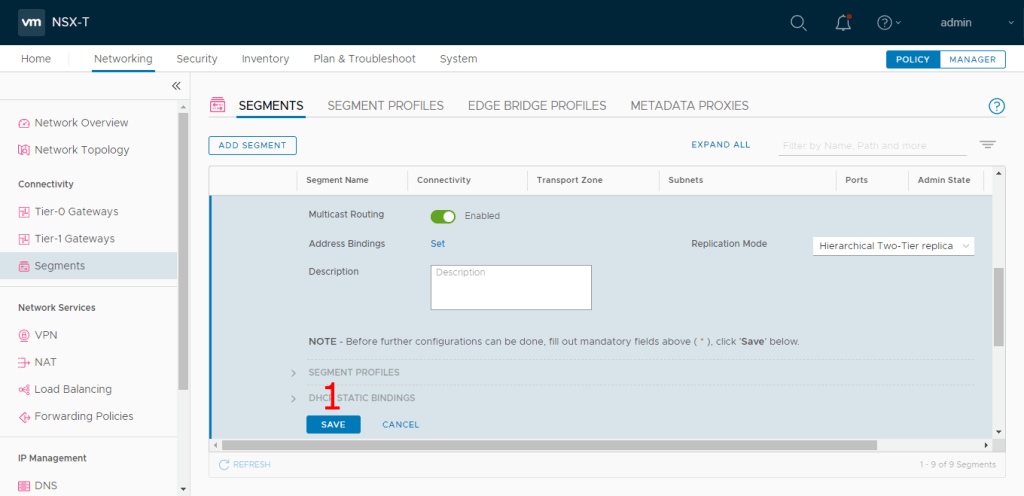
- Click SAVE to create the segment
East / West Security
In my environment we have the distributed firewall enabled with a default deny policy. This means we have to write rules to allow specific traffic in and out of every virtual machine. There’s a couple rules we need to write to make DHCP function. In this example I’m creating the policy in the EMERGENCY category just for the sake of the post. My production DHCP rules are in the INFRASTRUCTURE category.
We’ll create a rule to allow clients to broadcast DHCP requests first, then a second rule to allow the gateway to respond with the address.
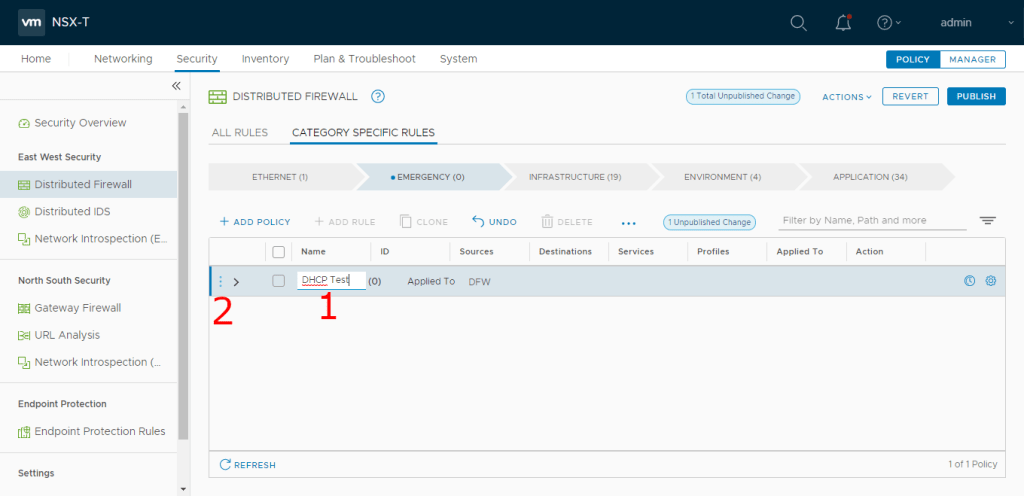
- Navigate to the Security tab
- Click Distributed Firewall under the East West Security heading
- Click CATEGORY SPECIFIC RULES
- Choose the appropriate category for your environment
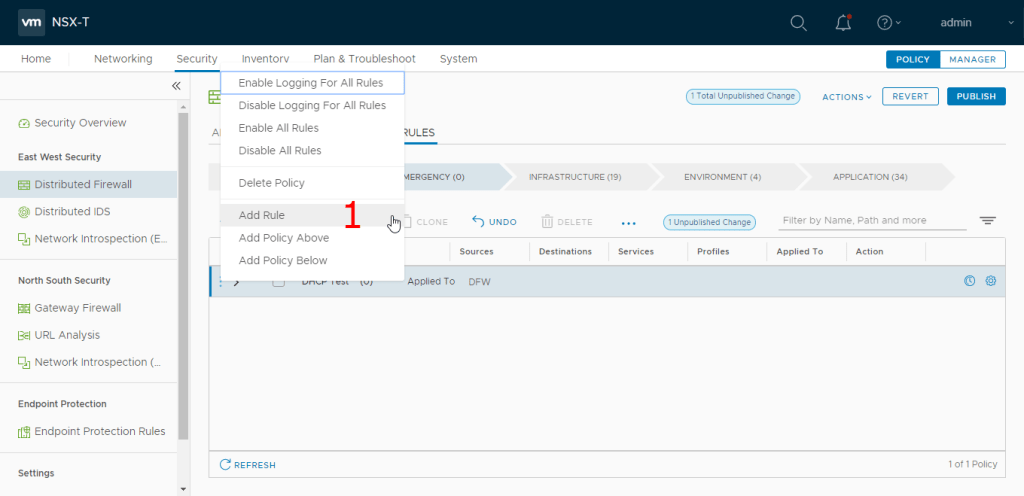
- Click ADD POLICY

- Enter the name of the policy
- Click the three dots at the left of the policy
- Click Add Rule
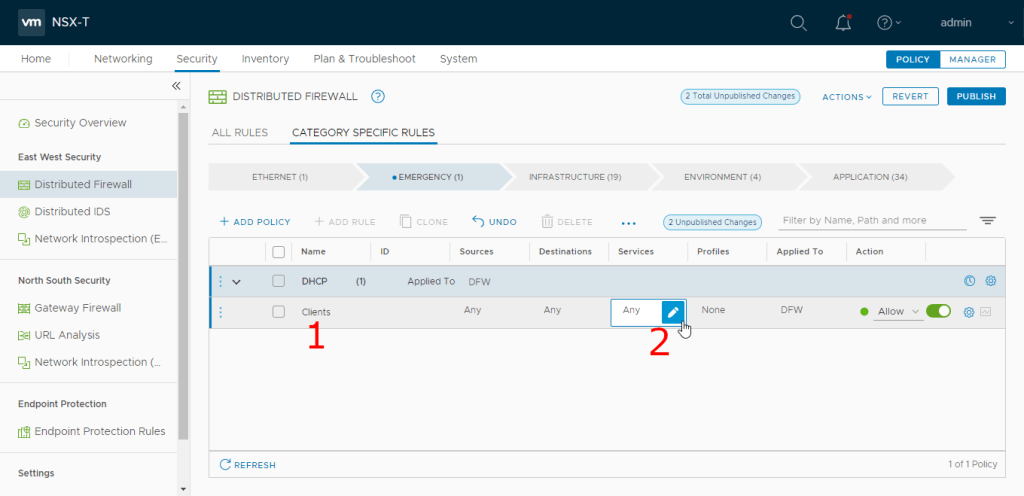
- Enter the policy name, in this case “Clients”
- Click the pencil icon in the Services column
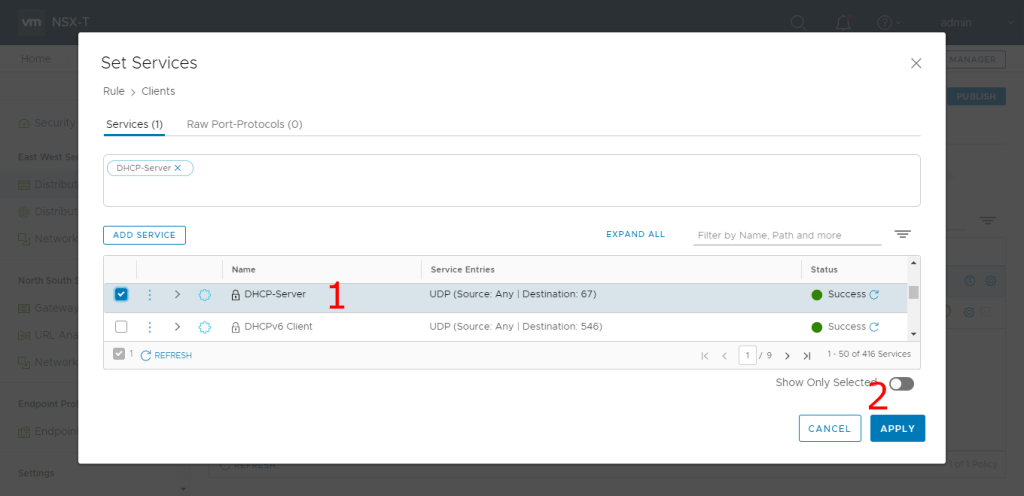
- Scroll down in the service list and check the box for DHCP-Server
- Click APPLY
- Click the three dots at the left of our first rule
- Click Add Rule
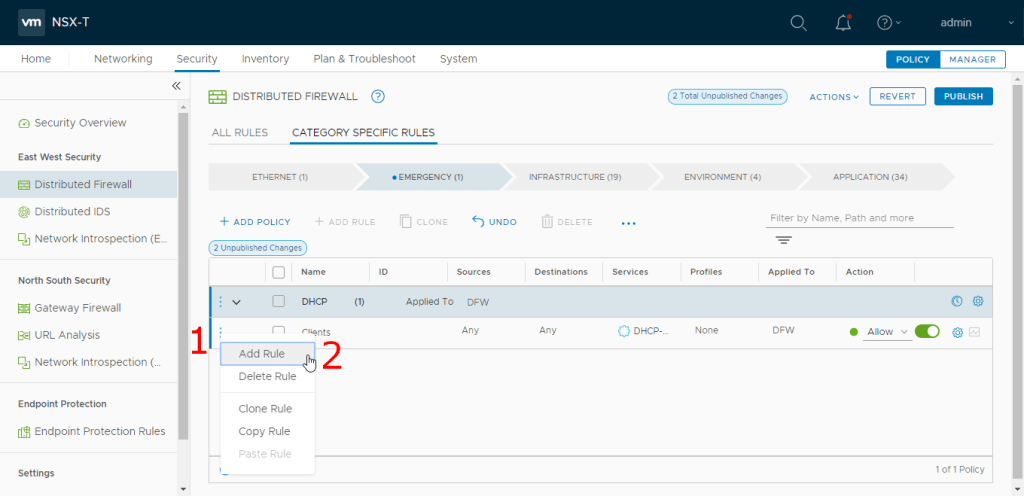
- Enter the name of the rule, in the case “Server”
- Click the pencil icon in the Sources column
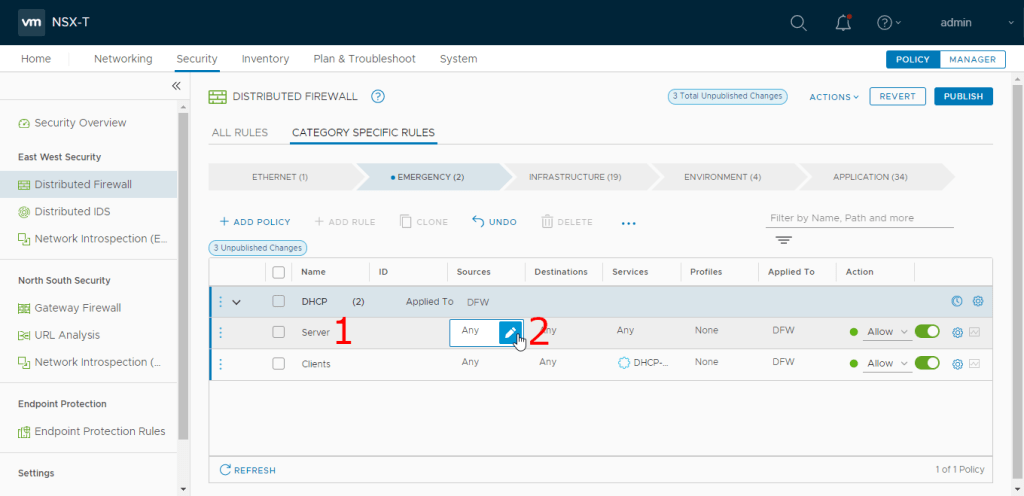
- Navigate to the IP Addresses tab
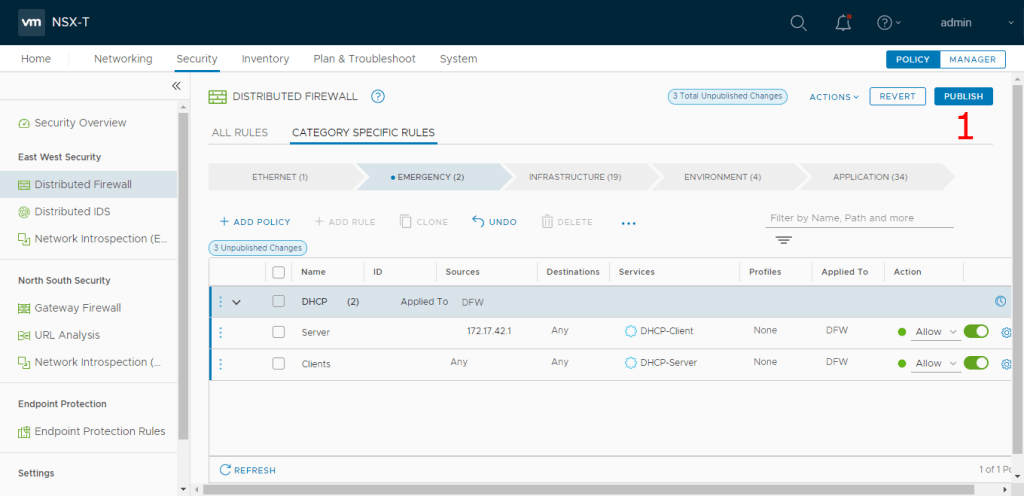
- Enter the Gateway IP address of our new segment.
- Click APPLY

- Click the pencil icon in the Services column

- Scroll down in the services list and choose DHCP-Client
- Click APPLY

- Finally, click PUBLISH to commit the security policy
Closing thoughts
It’s relatively straightforward to set up the DHCP relay service. However I struggled with it for a few days when we first set up NSX-T 2.5, and ultimately we ended up using the built in DHCP server to get us down the road. Now that we’ve upgraded to NSX-T 3.0 I wanted to give it another shot and this time around it worked. I suspect my security policy may have been the missing link the first time around.
One particularly annoying thing I’ve learned though: once you have a segment that’s using a DHCP profile you can’t change the DHCP settings on that segment. To change it you have to delete the whole segment and recreate it. The same quirk applies to the DHCP profile itself, you can’t edit the DHCP server IP addresses if any segments are configured to use the profile which means if you want to change your DHCP server address you have to delete EVERY segment that’s configured to use it, edit your settings, and then create new segments using the updated profile. This seems like a pretty horrible oversight, so keep that in mind if you’re thinking of changing DHCP servers.
